Frozen yoghurt bark is one of the easiest, healthiest, and most refreshing treats you can make at home. It’s creamy, crunchy, naturally sweet, and endlessly customizable. Whether you’re looking for a healthy frozen park snack, a kid-friendly dessert, or a quick grab-and-go breakfast option, frozen yoghurt bark ticks every box.
In this complete guide, you’ll learn to make frozen yoghurt bark and
its benefits
- What frozen yoghurt bark is
- Step-by-step instructions to prepare it
- Creative topping combinations
- Storage and serving tips
- The health benefits of frozen yoghurt bark
- Nutritional value and weight-management advantages
Let’s dive in.
What Is Frozen Yoghurt Bark?
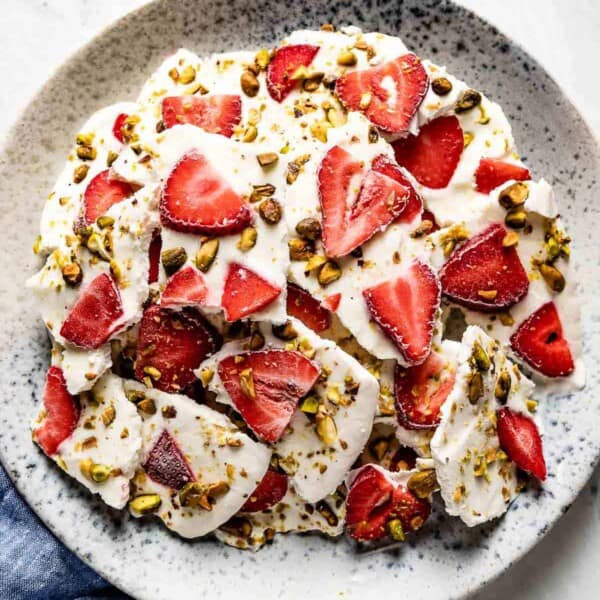
Frozen yoghurt bark is a thin layer of yogurt spread onto a baking sheet, topped with fruits, nuts, seeds, or other ingredients, then frozen until solid. Once frozen, it’s broken into irregular “bark-like” pieces — similar to chocolate bark.
Unlike ice cream, frozen yoghurt bark is lighter, less processed, and usually lower in sugar. It combines creamy yogurt with crunchy toppings, creating a balanced texture that feels indulgent but is surprisingly nutritious.
How to Prepare Frozen Yoghurt Bark (Step-by-Step Guide)
Making frozen yoghurt bark requires only a few ingredients and about 10 minutes of preparation time.
Ingredients (Basic Recipe)
- 2–3 cups thick plain Greek yogurt (or regular yogurt, strained)
- 2–3 tablespoons honey or maple syrup (optional)
- 1 cup mixed fresh fruits (berries, sliced bananas, kiwi, mango, etc.)
- 2–3 tablespoons nuts or seeds (almonds, pistachios, chia, pumpkin seeds)
- Optional: dark chocolate chips, coconut flakes, granola
Step 1: Prepare the Yogurt Base
In a mixing bowl:
- Add the yogurt.
- Stir in honey or maple syrup if you prefer a sweeter taste.
- Mix until smooth and creamy.
If you’re using regular yogurt, strain it using a cheesecloth for 30–60 minutes to remove excess water. Thick yogurt works best because it freezes better and creates a creamy texture.
Step 2: Line the Baking Tray
Take a flat baking sheet and line it with parchment paper. This prevents sticking and makes removal easy.
Step 3: Spread the Yogurt
Pour the yogurt mixture onto the lined tray. Use a spatula to spread it evenly.
Ideal thickness: About ¼ to ½ inch thick.
If it’s too thin, it becomes brittle. Too thick, and it becomes difficult to bite.
Step 4: Add Toppings
Sprinkle your chosen toppings evenly across the surface.
Some popular combinations include:
- Strawberries + blueberries + almonds
- Mango + coconut flakes
- Banana + peanut butter drizzle
- Raspberries + dark chocolate chips
- Granola + chia seeds + honey
Gently press toppings into the yogurt so they stick after freezing.
Step 5: Freeze
Place the tray in the freezer for 3–4 hours, or until completely solid.
For best results, freeze overnight.
Step 6: Break Into Pieces
Once frozen:
- Remove from freezer.
- Lift parchment paper.
- Break into uneven bark pieces using your hands or a knife.
Serve immediately or store properly (more on that below).
Creative Frozen Yoghurt Bark Flavour Ideas
Here are some delicious variations to keep things exciting:
1. Tropical Paradise
- Greek yogurt
- Mango chunks
- Pineapple bits
- Toasted coconut
2. Chocolate Lover’s Bark
- Vanilla yogurt
- Dark chocolate drizzle
- Strawberries
- Crushed almonds
3. Protein-Packed Power Bark
- Greek yogurt
- Peanut butter swirl
- Banana slices
- Chia seeds
4. Low-Sugar Keto-Friendly Bark
- Unsweetened Greek yogurt
- Stevia
- Raspberries
- Crushed walnuts
5. Kids’ Rainbow Bark
- Vanilla yogurt
- Blueberries
- Strawberries
- Kiwi
- Mini dark chocolate chips
Health Benefits of Frozen Yoghurt Bark
Frozen yoghurt bark isn’t just tasty — it offers real nutritional benefits.
1. Rich in Probiotics
Yogurt contains live probiotic cultures that support gut health. A healthy gut improves just like dessert.
- Digestion
- Nutrient absorption
- Immune system function
- Mental health balance
Greek yogurt especially contains active cultures that promote healthy gut bacteria.
2. High in Protein
Greek yogurt is packed with protein.
Benefits of protein include:
- Keeps you full longer
- Supports muscle repair
- Reduces cravings
- Stabilizes blood sugar
This makes frozen yoghurt bark an excellent snack for weight management.
3. Low in Calories Than Ice Cream
Compared to traditional ice cream, summer snack, frozen yoghurt bark:
- Contains less fat
- Has fewer calories
- Usually contains less sugar
- Is less processed
This makes it a smart dessert alternative.
4. Rich in Antioxidants
If you add berries like:
- Blueberries
- Strawberries
- Raspberries
You boost antioxidant intake. Antioxidants help fight inflammation and reduce oxidative stress in the body.
5. Good Source of Calcium
Yogurt is rich in calcium, which supports:
- Strong bones
- Healthy teeth
- Muscle contraction
- Nerve function
For children and older adults, calcium intake is especially important.
6. Supports Weight Loss Goals
Frozen yoghurt bark can help with weight management because:
- It controls sweet cravings
- It’s portion-controlled
- It’s high in protein
- It’s nutrient-dense
Replacing high-calorie desserts with frozen yoghurt bark can significantly reduce daily calorie intake.
Nutritional Value (Approximate Per Serving)
Depending on toppings, one medium piece contains:
- Calories: 80–150
- Protein: 5–10g
- Carbohydrates: 8–15g
- Fat: 2–6g
- Sugar: 5–10g
Using unsweetened yogurt and fresh fruit keeps sugar levels lower.
Is Frozen Yoghurt Bark Good for Kids?
Absolutely.
It’s:
- Less sugary than ice cream
- Rich in calcium
- Full of vitamins from fruit
- Easy to chew
- Fun to eat
You can even let kids help decorate their own bark before freezing. It’s a creative kitchen activity.
Frozen yoghurt bark is healthy also for kids.
Tips for Perfect Frozen Yoghurt Bark
To make sure your bark turns out perfectly every time:
Use Thick Yogurt
Greek yogurt gives a creamier texture.
Don’t Overload With Fruit
Too much fruit adds water, which forms ice crystals.
Freeze Flat
Ensure your tray sits flat in the freezer.
Cut Fruit Small
Large chunks can fall off when breaking bark.
Store Properly
Keep in an airtight container to prevent freezer burn.
How to Store Frozen Yoghurt Bark
- Store in an airtight container
- Keep in freezer for up to 2–3 weeks
- Place parchment paper between layers
- Let sit at room temperature for 2–3 minutes before eating
Avoid refreezing once thawed.
Common Mistakes to Avoid
- Using runny yogurt
- Adding too much liquid sweetener
- Not freezing long enough
- Using watery fruits like watermelon
- Storing uncovered
These mistakes affect texture and taste.
Can You Make It Dairy-Free?
Yes.
Make sure the alternative yogurt is thick and unsweetened for best results.
Is Frozen Yoghurt Bark Healthy?
Yes — when made with wholesome ingredients.
It becomes unhealthy only if:
- You add excessive chocolate
- Use heavily sweetened yogurt
- Add sugary syrups
Stick to natural ingredients for maximum benefits.
Frozen Yoghurt Bark for Different Diets
- High-protein diet: Use Greek yogurt + nuts
- Gluten-free: Skip granola
- Keto: Use full-fat yogurt + low-carb berries
- Vegetarian: Perfect as-is
- Diabetic-friendly: Use stevia instead of honey
Why Frozen Yoghurt Bark Is the Perfect Summer Snack
- No baking required
- Refreshing and cooling
- Quick to prepare
- Customizable
- Healthy and satisfying
It’s especially ideal during hot weather when you want something cold but not heavy.
Final Thoughts
Frozen yoghurt bark is more than just a trendy dessert. It’s a smart, nutritious, easy-to-make treat that fits into almost every lifestyle. With minimal ingredients and endless topping possibilities, it can satisfy sweet cravings without compromising health goals.
Whether you’re preparing snacks for kids, looking for a low-calorie dessert, or wanting to meal prep healthy treats for the week, frozen yoghurt bark is a simple and delicious solution.
Try it once, and it might just become your new favourite freezer staple.