Category: Lazy dinners

  • Crockpot Dinner Jollof Rice

    Jollof rice is one of the most celebrated dishes across West Africa. Known for its vibrant color, smoky flavor, and rich blend of spices, this one-pot rice dish often takes center stage at parties, family gatherings, and festive occasions. Traditionally, jollof rice is cooked on the stovetop, but with modern cooking techniques, many home cooks now turn to the crockpot (slow cooker) for convenience and consistent results.

    Cooking jollof rice in a crockpot allows you to enjoy the same delicious flavors with less hands-on monitoring. It’s a great option if you want to set your rice to cook slowly while focusing on other things. In this blog, we’ll explore a step-by-step guide on how to cook jollof rice in a crockpot, discuss variations, provide serving suggestions, and answer some frequently asked question

    What is Jollof Rice?

    Jollof rice is a tomato-based rice dish believed to have originated with the Wolof people of Senegal and Gambia, but today it

    Is enjoyed in Nigeria, Ghana, Sierra Leone, Liberia, and beyond. Each country (and even each family) has its unique spin on the dish, leading to endless debates about who makes the “best” jollof.

    The basic components usually include:

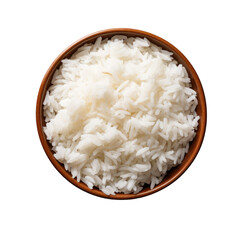
    • Long-grain parboiled rice (commonly used in Nigeria).
    • Tomato base (blended tomatoes, red bell peppers, onions, and Scotch bonnet peppers).
    • Seasonings and spices (thyme, curry powder, bay leaves, bouillon cubes, salt, etc.).
    • Stock (chicken, beef, or vegetable broth).
    • Aromatic vegetables (onions, garlic, ginger).

    When cooked in a crockpot, the slow simmering process allows the flavors to infuse deeply into the rice while maintaining its fluffy texture.

    Ingredients for Crockpot Jollof Rice

    Below is a standard ingredient list for cooking jollof rice in a crockpot (serves 6–8 people):

    For the Tomato Base (Stew Mix):

    • 4 medium ripe tomatoes
    • 2 large red bell peppers
    • 2 Scotch bonnet peppers (adjust to taste)
    • 2 medium onions (1 for blending, 1 for sautéing)
    • 3 cloves garlic
    • 1-inch piece fresh ginger

    Other Ingredients:

    • 3 cups long-grain parboiled rice (washed and drained)
    • ½ cup vegetable oil (or sunflower oil)
    • 3 tablespoons tomato paste
    • 2 teaspoons thyme
    • 2 teaspoons curry powder
    • 2 bay leaves
    • 2 seasoning cubes (or bouillon powder, to taste)
    • 4–5 cups chicken stock (or vegetable stock for vegetarian option)
    • Salt to taste

    Optional for extra flavor:

    • 1 teaspoon smoked paprika (for a smoky taste)
    • 1 tablespoon butter (to finish)

    Step-by-Step Guide: How to Cook Jollof Rice in a Crockpot

    Cooking jollof rice in a crockpot is straightforward but requires patience. Here’s a detailed step-by-step method:

    Step 1: Prepare the Tomato Base

    1. Blend tomatoes, red bell peppers, Scotch bonnets, 1 onion, garlic, and ginger until smooth.
    2. In a skillet (outside the crockpot), heat ½ cup oil, add sliced onions, and sauté until fragrant.
    3. Stir in tomato paste and fry for 2–3 minutes to remove its tangy taste.
    4. Add the blended tomato mixture, thyme, curry powder, and bay leaves. Cook on medium heat for 10–15 minutes until the sauce thickens and reduces.

     Why pre-cook the sauce?
    This step ensures that the raw taste of the tomatoes is eliminated before transferring to the crockpot. It enhances the depth of flavor.

    Step 2: Transfer to the Crockpot

    1. Grease the crockpot with a little oil or butter to prevent sticking.
    2. Pour the cooked tomato sauce into the crockpot.
    3. Add the washed rice and stir gently to combine with the sauce.
    4. Add stock (start with 4 cups, add more if needed), seasoning cubes, and salt. Mix well.

    Step 3: Cook in the Crockpot

    1. Cover and set the crockpot to High for 2 ½ – 3 hours or Low for 4–5 hours.
    2. Halfway through, stir gently to prevent the rice from clumping or burning at the sides.
    3. Once the rice is tender and fluffy, turn off the heat.

    Step 4: Finish and Serve

    Variations of Crockpot Jollof Rice

    Jollof rice is highly versatile, and the crockpot method allows you to experiment with different ingredients and flavors. Below are some popular variations:

    1. Party-Style Smoky Jollof

    Traditionally, party jollof rice has a distinct smoky flavor from being cooked over firewood. To replicate this in a crockpot:

    • Add 1 teaspoon smoked paprika or liquid smoke while cooking.
    • You can also slightly char the tomato sauce in a skillet before transferring it to the crockpot.

    2. Chicken Jollof Rice

    • Brown chicken pieces (drumsticks, thighs, or wings) in a skillet.
    • Arrange them on top of the rice mixture in the crockpot before cooking.
    • The juices from the chicken infuse the rice with extra flavour.

    3. Seafood Jollof Rice

    • Add shrimp, crab, or fish fillets during the last hour of cooking to avoid overcooking.
    • Seafood stock can replace chicken stock for enhanced taste.

    4. Vegetarian/Vegan Jollof Rice

    • Skip the meat stock and use vegetable broth.
    • Add vegetables like carrots, peas, green beans, or sweet corn in the last 30 minutes of cooking for freshness and crunch.

    5. Goat Meat or Beef Jollof Rice

    • Precook the meat until tender, then add it to the crockpot along with the rice and tomato base.
    • This gives the dish a rich and hearty flavor, perfect for special occasions.

    Serving Suggestions for Crockpot Jollof Rice

    Jollof rice is a main dish but shines even brighter when paired with complementary sides and proteins. Here are some serving ideas:

    1. With Fried Plantains (Dodo)
      The sweet caramelized flavor of fried ripe plantains balances the spicy and savory rice perfectly.
    2. With Grilled or Fried chicken
      A classic pairing in Nigerian and Ghanaian homes. You can serve chicken wings, drumsticks, or thighs.
    3. With Moi Moi (Steamed Bean Pudding)
      This protein-rich side dish made from blended beans is often served at parties alongside jollof rice.
    4. With Salad
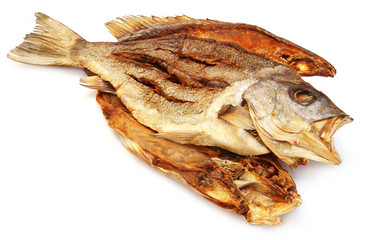
      A simple side salad of lettuce, cucumber, tomatoes, and boiled eggs drizzled with mayonnaise complements the richness of the rice.
    5. With Fish or Shrimps
      Grilled or fried fish pairs wonderfully with jollof rice. Shrimps can also be sautéed in garlic butter and served on top.
    6. With Suya or Grilled Meat (Beef Kebab)
      A spicy, smoky Nigerian-style kebab adds depth and texture to the meal.
    7. With Steamed Vegetables
      For a healthier option, pair with broccoli, green beans, or sautéed spinach.

    Tips for Perfect Crockpot Jollof Rice

    • Use parboiled rice to prevent mushiness. Long-grain parboiled rice holds its shape well during slow cooking.
    • Don’t add too much liquid at once. Start with less stock and add more if needed. Crockpots retain more moisture than stovetop cooking.
    • Pre-cook the tomato base to remove raw flavors and enhance depth.
    • Stir sparingly to avoid breaking the rice grains.
    • Adjust spices levels according to your preference. Add more Scotch bonnets for extra heat.

    Frequently Asked Questions (FAQs)

    1. Can I cook jollof rice entirely in the crockpot without pre-cooking the sauce?

    Technically yes, but it won’t taste as rich. Pre-cooking the sauce ensures the tomatoes are well fried, giving that authentic jollof taste.

    2. How do I prevent my jollof rice from being soggy in the crockpot?

    Use the right rice-to-liquid ratio. Crockpots don’t evaporate as much liquid as stovetops, so start with less stock and only add more if necessary.

    3. What kind of rice works best for crockpot jollof?

    Long-grain parboiled rice (such as Uncle Ben’s) is ideal because it stays firm and fluffy after slow cooking. Avoid short-grain or basmati rice, which may turn mushy.

    4. How long does crockpot jollof rice last?

    Stored in an airtight container in the fridge, it lasts up to 4 days. You can also freeze it for up to 1 month.

    5. Can I make smoky party jollof rice in a crockpot?

    Yes. Add smoked paprika or a few drops of liquid smoke. You can also slightly char your tomato sauce in a skillet before transferring it to the crockpot.

    6. How can I reheat crockpot jollof rice without drying it out?

    Sprinkle a little water or stock on the rice, cover, and reheat gently on the stovetop or in the microwave. This restores moisture and keeps the rice fluffy.

    7. Can I add vegetables directly to the crockpot?

    Yes, but add them toward the end (last 30 minutes) to maintain color and crunch.

    8. What proteins pair best with crockpot jollof rice?

    Chicken, beef, goat meat, fish, shrimps, or plant-based proteins like tofu or beans go well with it.

    9. Can I double the recipe in the crockpot?

    Yes, but cooking time will increase. Make sure your crockpot is large enough and stir occasionally to avoid clumping.

    10. Is jollof rice spicy?

    Traditionally, yes, because of Scotch bonnet peppers. However, you can adjust spice levels to suit your taste.

    Conclusion

    Cooking jollof rice in a crockpot is a modern, convenient twist on a classic West African favorite. It allows you to enjoy the same bold flavors with less monitoring, making it perfect for busy households or large gatherings. Whether you prefer it plain, with chicken, seafood, or vegetables, crockpot jollof rice is versatile, flavorful, and crowd-pleasing.

    By following this guide, experimenting with variations, and trying out the serving suggestions, you’ll be able to create a delicious pot of jollof rice that captures the essence of West African cuisine while embracing the ease of slow cooking.

    So, grab your crockpot, gather your ingredients, and get ready to serve up a warm, comforting dish of jollof rice that will leave your family and guests asking for seconds!

  • Dump and Go Crockpot Dinner Okra Soup.

    Okra soup is one of the most loved traditional dishes in Nigeria. Known for its rich flavors, slightly slimy texture, and incredible versatility, it has earned its place as a favorite across many tribes, especially among the Yoruba, Igbo, and Edo people. While it is traditionally cooked on stovetops in clay pots or large family pans, modern cooking methods like using a crockpot (slow cooker).Crockpot have made it more convenient to prepare while still retaining its authentic taste.

    In this blog, you’ll discover a step-by-step guide to cooking Nigerian okra soup in a crockpot, learn its delicious variations, explore serving suggestions, and get answers to common questions people ask about this nourishing dish.

    What is Nigerian Okra Soup?

    Nigerian okra soup is a savory, viscous soup made primarily from chopped or grated okra pods. Its signature slimy texture helps it pair beautifully with swallows like pounded yam, eba, semovita, amala, or fufu.

    The soup is typically cooked with assorted meats, fish, an

    d leafy greens such as spinach, ugu (pumpkin leaves), or bitterleaf, seasoned with traditional spices like crayfish and stockfish for depth of flavor.

    While stovetop methods are common, using a crockpot allows the ingredients to slow-cook, enhancing the flavors and making the meat tender while saving time and effort.

    Why Cook Okra Soup in a Crockpot?

    Cooking okra soup in a crockpot may sound unusual, but it offers several benefits:

    • Convenience: Just toss the ingredients into the slow cooker and let it do the work.
    • Tender Meat: The slow cooking process ensures beef, goat meat, or oxtail become very soft and flavorful.
    • Flavor Fusion: Spices and seasonings infuse better with a slow simmer.
    • Hands-off Cooking: Perfect for busy individuals or families who want to come home to a ready meal.

    Ingredients for Nigerian Okra Soup in a Crockpot

    Here’s a standard ingredient list for a hearty, family-sized crockpot okra soup:

    Protein (choose a mix for richer flavor)

    • 500g beef (cubed) or goat meat
    • 300g assorted meats (tripe, cow skin, or oxtail)
    • 200g stockfish (pre-soaked)
    • 200g smoked fish (deboned)
    • 200g dried fish (washed)
    • 200g fresh prawns or shrimp (optional)

    Vegetables

    • 500g fresh okra (finely chopped or grated)
    • 2 cups spinach, ugu, or kale (washed and chopped)
    • 1 large onion (chopped)
    • 2–3 fresh tomatoes (blended) – optional for variation

    Seasonings

    • 2–3 tablespoons ground crayfish
    • 3–4 tablespoons palm oil
    • 2 scotch bonnet peppers (blended with onion for spice)
    • 2 seasoning cubes or bouillon
    • 1 tablespoon ground locust beans (iru) – optional but adds depth
    • Salt to taste

    Step-by-Step: How to Cook Nigerian Okra Soup in a Crockpot

    Step 1: Prepare the Proteins

    • Wash and season beef or goat meat with salt, bouillon, and onions.
    • Pre-soak stockfish and dried fish in warm water until soft.
    • Boil tougher meats (like goat, tripe, or cow skin) briefly on the stovetop for 20–30 minutes before transferring to the crockpot. This shortens crockpot cooking time.

    Step 2: Start the Base in the Crockpot

    • Add your pre-cooked tougher meats, stockfish, and smoked fish into the crockpot.
    • Pour in 3–4 cups of stock.
    • Add crayfish, blended pepper-onion mix, and palm oil.
    • Stir lightly, cover, and cook on high for 2 hours or low for 4 hours.

    Step 3: Add Okra and Vegetables

    • About 45 minutes before serving, stir in the chopped or grated okra.
    • Add prawns or shrimp (if using).
    • Stir well so the okra combines with the broth.
    • Add chopped leafy greens last to retain their freshness and color.

    Step 4: Adjust Seasoning and Serve

    • Taste for salt, pepper, and seasoning.
    • Let simmer for another 15–20 minutes on high.
    • Turn off the crockpot and allow the soup to rest before serving.

    Variations of Nigerian Okra Soup in a Crockpot

    Okra soup is highly versatile. Here are some popular variations you can try:

    1. Seafood Okra Soup

    Instead of assorted meats, load your crockpot with prawns, crab, squid, periwinkles, and fresh fish. This coastal-style variation is lighter yet very flavorful.

    2. Ogbono and Okra Mix

    Add ground ogbono seeds (wild mango seeds) into the soup. This not only thickens it but also enhances the slimy consistency, loved by many Nigerians.

    3. Vegetarian Okra Soup

    Skip the meat and fish, using only mushrooms, tofu, and vegetables. Add extra palm oil and crayfish substitute for flavor depth.

    4. Okra and Tomato Soup

    Blend tomatoes, onions, and peppers as the base before adding okra. This gives the soup a slight tanginess, common among Yoruba households.

    5. Spicy Okra Soup

    For spice lovers, increase scotch bonnet peppers or add Cameroon pepper for extra heat.

    Serving Suggestions for Nigerian Okra Soup

    Okra soup is best enjoyed with Nigerian swallows, but it can also be eaten with rice or bread for a modern twist. Here are serving ideas:

    Traditional Swallows:

    • Modern Alternatives:
      • Brown rice or basmati rice
      • Couscous
      • Quinoa
      • Whole-wheat wraps or flatbread
    • Toppings & Garnishes:
      • Freshly chopped peppers for extra spice
      • A drizzle of palm oil for richness
      • Sliced onions for a rustic touch

    Nutritional Benefits of Nigerian Okra Soup

    • Rich in fiber: Supports digestion and bowel movement.
    • High in protein: Especially when cooked with assorted meats, stockfish, and prawns.
    • Packed with vitamins: Okra contains vitamins A, C, and K. Leafy greens add iron and folate.
    • Omega-3 fatty acids: From fish and crayfish, promoting heart health.
    • Low-carb option: Ideal for those on keto when paired with keto-friendly swallow like almond fufu.

    Tips for Cooking Okra Soup in a Crockpot

    1. Don’t overcook the okra – add it toward the end to retain its texture and viscosity.
    2. Palm oil goes in early – it binds the flavors and prevents separation.
    3. Use a mix of proteins – combining meat, fish, and seafood gives the best authentic Nigerian taste.
    4. Prep leafy greens last – this keeps them vibrant and nutrient-packed.
    5. Freeze-friendly – Okra soup stores well in the freezer for up to 3 months.

    Common Mistakes to Avoid

    • Adding okra too early: It can lose its sliminess and turn mushy.
    • Overloading with palm oil: A little goes a long way for flavor.
    • Not soaking dried fish/stockfish properly: This can make the soup gritty.
    • Cooking only with one protein: A variety gives the soup depth and richness.

    Frequently Asked Questions (FAQs)

    1. Can I cook okra soup overnight in a crockpot?

    Yes, you can cook the base (meats, stock, palm oil, and seasonings) overnight on low. Add the okra and vegetables the next day, 30–45 minutes before eating.

    2. Do I need to fry the palm oil first?

    Not necessarily. In a crockpot, the oil blends in as it heats slowly. But frying the oil with onions and crayfish on the stovetop before adding can deepen flavor.

    3. How do I reduce the sliminess of okra?

    If you prefer less slimy soup, cut the okra into larger chunks rather than grating it, and avoid over-stirring. Adding tomatoes also reduces viscosity.

    4. Can I make Nigerian okra soup without palm oil?

    Yes. Use vegetable oil or coconut oil, but note the flavor will differ from the traditional taste.

    5. How long does Nigerian okra soup last in the fridge?

    It can last up to 5 days in the fridge and about 3 months in the freezer when stored in airtight containers.

    6. Can I blend okra instead of chopping it?

    Yes, blending okra makes the soup smoother and slimier. Chopped okra, on the other hand, gives it more texture.

    7. What’s the best meat combination for okra soup?

    Goat meat, beef, and stockfish together provide the most authentic and delicious flavor balance.

    8. Can I make okra soup spicy without scotch bonnets?

    Yes, use chili flakes, cayenne pepper, or fresh jalapeños as alternatives.

    Conclusion

    Cooking Nigerian okra soup in a crockpot is a wonderful way to combine tradition with convenience. The slow cooker method ensures the meats become tender, the flavors intensify, and you can prepare this delicious dish without standing over the stove for hours.

    With endless variations, from seafood-rich to vegetarian-friendly, this dish caters to all palates. Pair it with swallows like pounded yam or try it with rice or couscous for a creative twist.

    Whether you’re Nigerian or simply a lover of African cuisine, okra soup cooked in a crockpot is a dish worth mastering for its taste, nutrition, and cultural significance.

  • Lazy Dinner Yam Porridge.

    Yam porridge, also called Adaro, is one of the most beloved comfort foods in West Africa. Known for its rich, savoury flavour and creamy texture, this dish is made primarily with yam—a starchy tuber widely consumed in Nigeria—combined with palm oil, tomatoes, peppers, onions, and various seasonings. Beyond being delicious, yam porridge is also highly nutritious, offering carbohydrates for energy, fiber for digestion, and a variety of vitamins and minerals that benefit overall health.

    In this blog, I will explore in detail how Nigerian yam porridge is prepared, answer frequently asked questions about the dish, highlight popular variations, and provide creative serving suggestions. Whether you’re Nigerian looking to refine your cooking skills, a food enthusiast eager to try African cuisine, or you are practicing clean eating, this comprehensive guide will equip you with everything you need to master yam porridge.

    A Brief Background on Yam Porridge

    Yam porridge (Asaro) originates from the Yoruba people of Nigeria but has become a staple dish across the country. Yams are not to be confused with sweet potatoes; Nigerian yams are large, white, starchy tubers that can be boiled, fried, roasted, or pounded. When cooked into porridge, the yam breaks down partially, giving the dish its signature creamy and hearty texture.

    Traditionally, yam porridge is cooked with palm oil for its deep flavor and color, blended peppers and tomatoes for aspicy kick, and smoked fish or crayfish for umami richness. Over time, many variations have emerged depending on personal preference, available ingredients, and regional influences.

    Ingredients for Nigerian Yam Porridge

    To prepare a classic Nigerian yam porridge, you’ll need the following ingredients:

    • Medium-sized yam tuber (about 1.5–2 kg) – peeled and cut into medium chunks
    • Palm oil (½ cup) – adds richness and the classic orange color
    • Tomatoes (3 large) – blended or finely chopped
    • Red bell peppers (2) – for sweetness and depth
    • Scotch bonnet peppers (1–2, depending on spice preference) – for heat
    • Onion (1 large) – chopped
    • Crayfish (2 tablespoons, ground) – for smoky umami flavor
    • Smoked fish or stockfish (optional, 1–2 pieces) – adds depth of flavor
    • Seasoning cubes or powder (2–3 cubes) – such as Maggi or Knorr
    • Salt (to taste)
    • Water or stock (about 5–6 cups)
    • Vegetables (optional: spinach, ugu leaves, or kale) – for added nutrition

    Step-by-Step Guide: How to Prepare Yam Porridge

    Step 1: Prepare the Yam

    • Peel the yam tuber, cut it into medium-sized cubes, and rinse them thoroughly in cold water to remove excess starch.

    Step 2: Make the Pepper Blend

    • Blend tomatoes, red bell peppers, scotch bonnet peppers, and half the onion into a smooth paste. Set aside.

    Step 3: Fry the Base

    • In a large pot, heat palm oil on medium heat. Add the remaining chopped onions and sauté until fragrant.
    • Pour in the blended pepper mixture and allow it to cook for 10–15 minutes, stirring occasionally, until the raw taste is gone, and the sauce thickens.

    Step 4: Build the Flavor

    • Add crayfish, smoked fish (if using), seasoning cubes, and salt. Stir well.
    • Pour in about 5–6 cups of water or stock, then bring the mixture to a boil.

    Step 5: Cook the Yam

    • Gently add the yam cubes into the pot, ensuring they are evenly submerged in the sauce.
    • Cover the pot and let it cook for 20–25 minutes, stirring occasionally.

    Step 6: Mash and Adjust Consistency

    • Once the yam is soft, use a wooden spoon to mash some pieces against the pot. This thickens the porridge while leaving some chunks intact for texture.
    • If the porridge is too thick, add a little more water or stock. If it’s too thin, let it cook uncovered for a few extra minutes.

    Step 7: Add Vegetables

    • Add your choice of green leafy vegetables (spinach, ugu, or kale) toward the end of cooking. Stir well and let it simmer for another 3–5 minutes.

    Step 8: Serve

    • Turn off the heat and allow the dish to rest for a few minutes before serving.

    Variations of Yam Porridge

    One of the reasons yam porridge remains a favorite is its versatility. Depending on regional traditions and personal preferences, you can prepare it in many ways:

    1. Yam and Plantain Porridge
      1. Add ripe or semi-ripe plantains for a sweet twist. The plantains blend beautifully with the yam, giving the porridge a unique flavor.
    2. Yam and Vegetable Porridge
      1. Include an abundance of vegetables like ugu, spinach, or pumpkin leaves. This variation boosts the nutritional value and adds a refreshing, earthy taste.
    3. Seafood Yam Porridge
      1. Replace or supplement smoked fish with prawns, crabs, or periwinkle for a coastal-inspired dish.
    4. Yam and Goat Meat Porridge
      1. Add seasoned, parboiled goat meat for a hearty and protein-rich variation.
    5. Oil-Free Yam Porridge
      1. For a healthier option, skip palm oil and use vegetable oil instead. Though less traditional, this appeals to those looking for a lighter version.
    6. Pepper-Heavy Yam Porridge
      1. For spice lovers, increase the quantity of scotch bonnet peppers for a fiery, tongue-tingling experience.

    Serving Suggestions for Yam Porridge

    Yam porridge is incredibly versatile in how it can be served. Here are some ideas:

    • With Fried Plantains: The sweetness of fried plantains complements the savory richness of yam porridge.
    • With Grilled Fish or Chicken: Adding a side of protein makes the meal more balanced.
    • With Avocado Slices: Creamy avocado pairs beautifully with the spicy and starchy dish.
    • At Parties: Serve yam porridge in small bowls as a comforting, crowd-pleasing dish.
    • For Breakfast or Dinner: Yam porridge is flexible enough to be eaten at any time of the day.
    • As a Comfort Food: Many Nigerians eat yam porridge when craving something warm and satisfying.

    Frequently Asked Questions (FAQs) about Nigerian Yam Porridge

    1. What type of yam is best for yam porridge?

    White yam (often called Puna yam) is the best for yam porridge. It softens nicely and gives the dish a creamy consistency.

    2. Can I make yam porridge without palm oil?

    Yes, you can substitute with vegetable oil, coconut oil, or olive oil, though palm oil provides the most authentic flavor and color.

    3. Can yam porridge be made in advance?

    Yes, yam porridge can be prepared ahead and stored in the fridge for up to 3 days. Reheat gently on the stove, adding a splash of water if it thickens too much.

    4. Is yam porridge healthy?

    Absolutely. Yam is a complex carbohydrate, providing long-lasting energy. Combined with vegetables, protein (fish or meat), and healthy fats from palm oil, yam porridge makes a balanced meal.

    5. Can I freeze yam porridge?

    Yes, you can freeze yam porridge in airtight containers for up to 1 month. Thaw overnight in the fridge and reheat before serving.

    6. How spicy should yam porridge be?

    The spice level is entirely up to you. While traditional yam porridge is moderately spicy, you can adjust the number of scotch bonnet peppers to suit your taste.

    7. Can children eat yam porridge?

    Yes, yam porridge is kid-friendly. Just reduce the amount of pepper when cooking for children.

    8. What can I use instead of crayfish?

    If crayfish isn’t available, you can use fish sauce or smoked paprika to mimic its flavor.

    Nutritional Benefits of Nigerian Yam Porridge

    Apart from being tasty, yam porridge is also packed with nutrients:

    • Carbohydrates – Provide energy for daily activities.
    • Dietary Fiber – Aids digestion and prevents constipation.
    • Vitamin A – From palm oil and vegetables, supports vision and immunity.
    • Vitamin C – From peppers and tomatoes, helps in collagen production.
    • Protein – From fish, crayfish, or meat, supports muscle repair.
    • Iron and Potassium – Support blood health and heart function.

    Conclusion

    Nigerian yam porridge (Asaro) is more than just a dish—it’s a cultural experience. Its creamy, spicy, and comforting flavor makes it a staple meal in Nigerian households. With simple ingredients and easy preparation steps, anyone can recreate this delicious dish, whether in Nigeria or abroad.

    By experimenting with different variations—adding seafood, vegetables, or plantains—you can tailor yam porridge to your taste and dietary needs. Served alone or with sides like plantains, avocado, or grilled proteins, yam porridge remains one of the most versatile and satisfying dishes from West Africa.

    If you’ve never tried yam porridge, now is the perfect time. Gather your ingredients, follow the steps, and enjoy this hearty meal that connects you to the rich culinary traditions of West Africa.

  • Salmon and Broccoli Pasta Recipe Dinner


    When it comes to preparing a meal that combines taste, nutrition, and elegance, salmon and broccoli pasta is a top contender. This dish offers a perfect balance between the rich, omega-3-packed salmon, the fiber-rich broccoli, and the comforting satisfaction of pasta. Whether you’re seeking a wholesome dinner idea, a recipe that supports heart health, or a flavorful way to eat more vegetables and lean protein, salmon and broccoli pasta makes an excellent choice.

    In this blog, we will walk through a detailed step-by-step recipe on how to prepare salmon and broccoli pasta, explore variations to suit your preferences, and dive into its many nutritional benefits. From supporting heart health and boosting immunity to improving digestive wellness, this dish is more than just a meal—it’s food for vitality.

    Section 1: Why Salmon and Broccoli Pasta Is a Smart Choice

    A Perfect Nutritional Match

    • Salmon provides high-quality lean protein, healthy fats, and essential vitamins. It’s famous for its omega-3 fatty acids, which support heart and brain health.
    • Broccoli is rich in vitamins C, K, and A, along with dietary fiber and antioxidants, making it excellent for immunity and digestion.
    • Pasta adds energy-providing complex carbohydrates, making the dish balanced and filling.

    Flavor and Versatility

    Unlike many heavy pasta recipes, salmon and broccoli pasta manages to be light yet satisfying, blending earthy greens with tender, flaky salmon. It works well for quick weeknight meals, elegant dinners, or meal prep.

    Section 2: Ingredients for Salmon and Broccoli Pasta

    Here’s a list of what you’ll need to prepare a simple yet delicious salmon and broccoli pasta:

    • 200g salmon fillet (fresh or smoked)
    • 200g pasta (penne, fusilli, or spaghetti work well)
    • 1 head of broccoli, cut into florets
    • 2 cloves garlic, minced
    • 2 tablespoons olive oil
    • Juice of half a lemon
    • 1/2 cup low-fat cream or Greek yogurt (optional for creaminess)
    • Salt and black pepper, to taste
    • Fresh parsley or dill for garnish
    • Grated Parmesan cheese (optional, for extra flavour)

    Section 3: Step-by-Step Recipe – How to Prepare Salmon and Broccoli Pasta

    Step 1: Prepare the Pasta

    • Boil water with a pinch of salt.
    • Add the pasta and cook according to package instructions until al dente.
    • In the last 3 minutes of cooking, add the broccoli florets to the boiling pasta water.
    • Drain and set aside, reserving a little pasta water.

    Step 2: Cook the Salmon

    • Season the salmon with a little salt, pepper, and lemon juice.
    • In a nonstick pan, heat olive oil over medium heat.
    • Place the salmon fillet skin-side down and cook for 3–4 minutes per side until fully cooked and flaky.
    • Remove from heat, let it rest, then break into bite-sized chunks.

    Step 3: Make the Sauce

    • In the same pan, sauté garlic in a little olive oil until fragrant.
    • Add the low-fat cream or Greek yogurt (optional) and stir gently.
    • Add lemon juice for freshness and adjust seasoning.
    • For a lighter version, skip cream and use a splash of pasta water instead.

    Step 4: Combine Everything

    • Add drained pasta and broccoli to the sauce.
    • Gently fold in the salmon chunks.
    • Mix well so that the pasta is coated evenly.

    Step 5: Serve and Garnish

    • Serve warm, garnished with fresh herbs and Parmesan cheese if desired.
    • Pair with a side salad or garlic bread for a complete meal.

    Section 4: Variations of Salmon and Broccoli Pasta

    This recipe is adaptable to different tastes and dietary needs:

    1. Creamy Salmon Broccoli Pasta – Use heavy cream or cream cheese for a richer texture.
    2. Whole Wheat or Gluten-Free Version – Substitute with whole-grain or gluten-free pasta.
    3. Smoked Salmon Pasta – Use smoked salmon instead of fresh for a more intense flavor.
    4. Mediterranean Style – Add sun-dried tomatoes, olives, and feta cheese for extra flavor.
    5. Spicy Twist – Add chili flakes or a dash of cayenne pepper for some heat.

    Section 5: Nutritional Benefits of Salmon and Broccoli Pasta

    1. Rich Source of Lean Protein

    Salmon provides high-quality protein essential for muscle repair, energy, and maintaining a healthy metabolism. Pairing it with pasta ensures a balanced intake of carbs and protein, making it an excellent post-workout meal.

    2. Packed with Omega-3 Fatty Acids

    One of the most notable benefits of salmon is its omega-3 fatty acids, which:

    • Reduce inflammation in the body.
    • Lower the risk of heart disease.
    • Support cognitive function and memory.
    • Improve joint health and flexibility.

    3. Fiber and Antioxidants from Broccoli

    Broccoli is a powerhouse of nutrition. It:

    • Provides dietary fiber, aiding digestion and satiety.
    • Contains vitamin C, boosting immunity and skin health.
    • Offers antioxidants like sulforaphane, which fight free radical damage.

    4. Heart Health Support

    The combination of salmon’s omega-3s, broccoli’s antioxidants, and olive oil’s monounsaturated fats makes this dish a heart-healthy choice. Regular consumption may help lower cholesterol and blood pressure.

    5. Weight Management Friendly

    Despite being flavorful and satisfying, salmon and broccoli pasta can fit into a weight-loss plan.

    • Use whole-grain pasta for extra fiber.
    • Replace cream with Greek yogurt for reduced calories.
    • Load up on broccoli to bulk up the dish without excess calories.

    6. Bone and Joint Health

    Broccoli contributes vitamin K and calcium, both essential for bone strength. Meanwhile, salmon offers vitamin D, which enhances calcium absorption—together they form a bone-boosting duo.

    7. Energy and Mood Support

    Pasta provides steady energy, while salmon’s omega-3s are linked to improved mood and reduced risk of depression. This dish nourishes both body and mind.

    Section 6: Nutritional Breakdown (Per Serving Approximation)

    • Calories: 480–520 kcal
    • Protein: 32g
    • Carbohydrates: 45g
    • Fat: 18g (mostly healthy fats)
    • Fiber: 6–7g
    • Omega-3 fatty acids: 2g

    (Values may vary depending on portion sizes and added ingredients.)

    Section 7: Tips for Making the Perfect Salmon and Broccoli Pasta

    • Use fresh salmon fillets for the best texture and flavor.
    • Don’t overcook broccoli—keep it slightly crisp for better nutrients.
    • Save a little pasta water to adjust sauce consistency.
    • Season well with herbs like dill, parsley, or basil for freshness.
    • Make extra portions for meal
    • prep—this dish stores well for up to 2 days.

    Section 8: Frequently Asked Questions

    1. Can I make salmon and broccoli pasta without cream?
    Yes, simply use olive oil, lemon juice, or a splash of pasta water for a light, fresh version.

    2. Is this dish suitable for kids?
    Absolutely! It’s nutrient-dense, flavorful, and mild enough for children.

    3. Can I substitute frozen broccoli and salmon?
    Yes, frozen broccoli and salmon are convenient options. Just thaw properly before cooking.

    4. How can I make it low-carb?
    Swap pasta with zucchini noodles or chickpea pasta to reduce carbs while keeping protein high.

    Conclusion

    Salmon and broccoli pasta is not just a delicious dish—it’s a nutritional powerhouse that delivers protein, omega-3 fatty acids, antioxidants, vitamins, and minerals all in one plate. By learning how to prepare it at home, you can create a meal that is both comforting and beneficial to your health.

    Whether you’re cooking for yourself, your family, or entertaining guests, this recipe combines elegance, flavor, and wellness. So the next time you crave pasta, skip the heavy sauces and give salmon and broccoli pasta a try—you’ll be nourishing your body while indulging your taste buds.

  • Chicken Cordon Bleu Recipe for Dinner.

    Chicken cordon bleu is one of those classic dishes that combines comfort, elegance, and indulgence in a single bite. Originating in Europe, this dish has gained popularity worldwide for its crispy golden exterior, juicy chicken, creamy cheese, and savoury ham hidden inside. While it looks sophisticated, preparing chicken cordon bleu at home is easier than many people think. Beyond its delicious taste, chicken cordon bleu also offers several nutritional benefits when prepared with quality ingredients and balanced cooking techniques.

    In this blog, we will take a deep dive into how to prepare chicken cordon bleu step by step, explore its variations, and then break down the health benefits that make this dish not only enjoyable but also nourishing when eaten in moderation.

    The Origins of Chicken Cordon Bleu

    Before diving into the recipe, it’s interesting to know where chicken cordon bleu came from. The term cordon bleu means “blue ribbon” in French and was historically used to refer to culinary excellence. While some credit Switzerland as the birthplace of this dish, others link it to France. Either way, chicken cordon bleu is essentially a schnitzel-style preparation where chicken breast is stuffed with ham and cheese, breaded, and fried or baked until crisp.

    Over time, the dish evolved with variations including pork, veal, and even vegetarian alternatives. Today, chicken cordon bleu remains the most popular and beloved version, served in restaurants, hotels, and family kitchens around the world.

    Ingredients for Chicken Cordon Bleu

    The magic of chicken cordon bleu lies in its simple yet rich ingredients. To prepare it at home, you’ll need:

    • 4 boneless, skinless chicken breasts
    • 4 slices of ham (lean ham works best)
    • 4 slices of Swiss cheese (you can substitute Gruyère or mozzarella)
    • 1 cup breadcrumbs (panko gives extra crunch)
    • 1/2 cup all-purpose flour
    • 2 large eggs (beaten)
    • Salt and black pepper (to taste)
    • 1 teaspoon garlic powder (optional, for flavor)
    • 1 teaspoon paprika (optional, for color and taste)
    • 2 tablespoons olive oil or melted butter (for baking)
    • Toothpicks (to secure the rolls)

    Optional: You can also prepare a creamy Dijon mustard sauce or a light lemon butter sauce to drizzle over the finished chicken.

    Step-by-Step Preparation of Chicken Cordon Bleu

    1. Prepare the Chicken

    • Start by placing the chicken breasts on a clean cutting board.
    • Using a sharp knife, carefully butterfly each chicken breast by slicing it horizontally but not all the way through, creating a pocket.
    • Place the chicken between two sheets of plastic wrap or parchment paper. Use a meat mallet or rolling pin to pound the chicken to an even thickness (about 1/4 inch). This ensures quick and uniform cooking.

    2. Add the Fillings

    • Lay a slice of ham and a slice of Swiss cheese onto each flattened chicken breast.
    • Roll the chicken tightly, starting from one end, tucking in the sides to enclose the filling.
    • Secure each roll with toothpicks to prevent it from opening during cooking.

    3. Season and Coat the Chicken

    • Season the outside of the chicken rolls with salt, pepper, garlic powder, and paprika.
    • Dredge each roll lightly in flour, dip into the beaten eggs, and coat thoroughly with breadcrumbs. This three-step breading process creates a crisp outer layer that seals in moisture and flavor.

    4. Cook the Chicken

    There are two primary methods for cooking chicken cordon bleu:

    a. Baking (Healthier Option)

    • Preheat your oven to 375°F (190°C).
    • Place the breaded chicken rolls on a greased baking sheet or a parchment-lined tray.
    • Drizzle lightly with olive oil or melted butter to help with browning.
    • Bake for 25–30 minutes, or until the chicken is golden brown and the internal temperature reaches 165°F (74°C).

    b. Pan-Frying (Traditional Option)

    • Heat about 1/4 cup of vegetable oil in a skillet over medium heat.
    • Place the chicken rolls seam-side down and cook for 4–5 minutes per side until golden brown.
    • Transfer to a baking dish and finish cooking in a preheated oven at 350°F (175°C) for 15–20 minutes until fully cooked.

    5. Rest and Serve

    • Remove the toothpicks and let the chicken rest for a few minutes before slicing.
    • Serve with steamed vegetables, roasted potatoes, a fresh salad, or over a bed of rice.
    • Optionally, drizzle with Dijon mustard cream sauce or a squeeze of lemon juice.

    Variations of Chicken Cordon Bleu

    While the classic recipe is universally loved, you can customize it to fit your dietary needs and flavor preferences:

    1. Grilled Cordon Bleu – Skip breading and baking. Instead, grill the chicken rolls for a lighter, carb-free version.
    2. Low-Carb/Keto Cordon Bleu – Use almond flour or crushed pork rinds instead of breadcrumbs.
    3. Air-Fried Cordon Bleu – Air fry at 375°F (190°C) for 18–20 minutes for a crispy, healthier alternative to frying.
    4. Vegetarian Cordon Bleu – Replace chicken with large zucchini slices, eggplant, or even portobello mushrooms stuffed with cheese and plant-based ham substitutes.
    5. Saucy Version – Smother the baked chicken in a homemade white sauce or mushroom gravy for extra indulgence.

    Health Benefits of Chicken Cordon Bleu

    At first glance, chicken cordon bleu might seem like a heavy, indulgent dish. However, when prepared with quality ingredients and healthier cooking methods, it provides several health benefits.

    1. High-Quality Protein Chicken breast is one of the leanest sources of protein. A serving of chicken cordon bleu provides about 25–30 grams of protein, which supports muscle repair, satiety, and energy production. Protein is especially vital for athletes, growing children, and individuals aiming to maintain lean body mass

    2. Rich in Essential Vitamins and Minerals

    • B Vitamins (B6 and B12) from chicken and ham support metabolism and nerve health.
    • Zinc and Iron from ham contribute to immune function and oxygen transport in the body.
    • Calcium and Vitamin D from Swiss cheese strengthen bones and teeth.

    3. Energy-Sustaining Nutrients

    The combination of lean protein, cheese fat, and breadcrumbs provides a balance of macronutrients—protein, carbohydrates, and fats. This makes chicken cordon bleu a filling meal that can fuel daily activities without unnecessary snacking.

    4. Bone and Joint Health

    The Swiss cheese in chicken cordon bleu is an excellent source of calcium and phosphorus, minerals essential for strong bones. Pairing the dish with leafy green vegetables enhances this benefit further.

    5. Heart Health (When Prepared Mindfully)

    While frying adds excess saturated fat, baking chicken cordon bleu with olive oil keeps it heart-friendly. Olive oil is rich in monounsaturated fats, which help regulate cholesterol levels. Additionally, using lean ham reduces sodium intake, making the dish more suitable for cardiovascular health.

    6. Weight Management Benefits

    Protein-rich meals like chicken cordon bleu help control hunger by promoting satiety. Eating it with a side of vegetables instead of heavy starches can turn it into a balanced, weight-conscious meal.

    7. Supports Brain Function

    Swiss cheese provides Vitamin B12, while chicken contributes amino acids like tryptophan, which are precursors to neurotransmitters. Together, these nutrients support brain function, memory, and mood regulation.

    Tips for a Healthier Chicken Cordon Bleu

    1. Bake Instead of Fry – Cuts calories and reduces excess oil intake.
    2. Use Whole-Grain Breadcrumbs – Adds fiber and makes the coating more nutritious.
    3. Opt for Lean Ham – Reduces sodium and saturated fat.
    4. Choose Reduced-Fat Cheese – Lowers overall calorie intake while keeping the flavor.
    5. Pair with Vegetables – Balances the richness with vitamins, minerals, and fiber.
    6. Portion Control – Serve one piece alongside light sides rather than large, heavy portions.

    Suggested Sides for Chicken Cordon Bleu

    • Steamed broccoli, carrots, or green beans for a light and colorful plate.
    • Mashed sweet potatoes for a nutrient-dense alternative to regular mashed potatoes.
    • Quinoa salad with lemon dressing for added protein and fiber.
    • Brown rice pilaf to balance the richness with whole grains.
    • Fresh garden salad with olive oil and balsamic vinegar.

    Conclusion

    Chicken cordon bleu is more than just a restaurant favorite—it’s a dish you can easily prepare at home with basic ingredients. From pounding the chicken flat to rolling it with ham and cheese, breading it, and cooking it to golden perfection, the process is simple yet rewarding.

    Beyond its culinary appeal, chicken cordon bleu also has a range of health benefits. It’s packed with protein, essential vitamins, and minerals, and when prepared using healthier methods like baking or air frying, it can fit seamlessly into a balanced diet. Whether you’re cooking for your family, hosting guests, or simply treating yourself, chicken cordon bleu offers the perfect balance of flavor, texture, and nutrition.

    So, next time you want to impress in the kitchen, roll up your sleeves, prepare chicken cordon bleu, and enjoy not just its delicious taste but also its nourishing benefits.

  • Lazy Dinner Pasta Primavera

    Pasta primavera is a vibrant, vegetable-packed Italian-American dish that celebrates the freshness of seasonal produce. The word primavera means “spring” in Italian, which reflects the dish’s roots: a light and colourful pasta infused with crisp vegetables, herbs, and often a touch of cheese or olive oil. Unlike heavy cream-based pasta recipes, pasta primavera emphasizes freshness, balance, and nutrition.

    This blog will guide you step by step on how to prepare pasta primavera at home, explore variations, and dive into its many health benefits. By the end, you’ll not only have a delicious recipe in your pocket but also a deeper appreciation for why this dish can be a wholesome addition to your diet.

    Ingredients for Classic Pasta Primavera

    One of the beauties of this dish is that you can tailor it to what’s in season or available. However, a traditional base might include:

    • Pasta: Spaghetti, fettuccine, penne, or farfalle. Whole wheat or gluten-free options also work.
    • Vegetables: Zucchini, bell peppers, cherry tomatoes, broccoli, carrots, snap peas, and asparagus are common choices.
    • Aromatics: Garlic, onion, and fresh herbs such as basil, parsley, or thyme.
    • Olive oil: A healthy fat that ties everything together.
    • Parmesan cheese (optional): Adds richness without overpowering the vegetables.
    • Seasonings: Salt, black pepper, red pepper flakes, and lemon juice for brightness.

    Step-by-Step Guide: How to Prepare Pasta Primavera

    Step 1: Select and Prepare Your Vegetables

    Choose a variety of colorful vegetables for visual appeal and nutritional diversity. Wash thoroughly, then chop them into bite-sized pieces. Keep in mind that different vegetables have varying cooking times—for example, carrots take longer than zucchini—so you may need to stagger their addition to the pan.

    Step 2: Cook the Pasta

    • Bring a large pot of salted water to a rolling boil.
    • Add your pasta of choice and cook until al dente (firm to the bite).
    • Reserve about one cup of pasta water before draining. This starchy liquid will help bind the sauce later.

    Step 3: Sauté the Vegetables

    • In a large skillet or pan, heat 2–3 tablespoons of olive oil over medium heat.
    • Add garlic and onions first, cooking until fragrant.
    • Next, add the harder vegetables such as carrots and broccoli. Sauté for 3–4 minutes.
    • Then, toss in softer vegetables like zucchini, bell peppers, and cherry tomatoes. Stir gently until tender but still crisp.
    • Season with salt, pepper, and a squeeze of lemon juice.

    Step 4: Combine Pasta and Vegetables

    • Add the drained pasta to the skillet with vegetables.
    • Toss everything together, adding a splash of reserved pasta water to create a light coating sauce.
    • Mix in fresh herbs like basil or parsley for aroma and freshness.

    Step 5: Garnish and Serve

    • Sprinkle with grated Parmesan cheese (optional) or nutritional yeast for a vegan version.
    • Top with a drizzle of extra virgin olive oil and freshly cracked black pepper.
    • Serve warm, ideally with whole grain bread or a side salad.

    Variations of Pasta Primavera

    The flexibility of this dish makes it easy to adapt:

    • Creamy Primavera: Add a splash of cream or cashew cream for a richer texture.
    • Protein-Packed Primavera: Include grilled chicken, shrimp, or chickpeas for added protein.
    • Low-Carb Primavera: Use zucchini noodles or spaghetti squash instead of traditional pasta.
    • Vegan Primavera: Skip cheese and opt for olive oil, lemon, and herbs as the main flavorings.
    • Spicy Primavera: Add red pepper flakes or chili oil for a little kick.

    Nutritional Breakdown of Pasta Primavera

    A standard serving of pasta primavera (about 2 cups with whole wheat pasta and mixed vegetables) typically provides:

    • Calories: 350–450 (depending on pasta type and oil amount)
    • Protein: 10–15 g
    • Carbohydrates: 55–65 g
    • Fiber: 8–10 g
    • Fat: 10–15 g (mainly from olive oil)
    • Vitamins: Rich in vitamin A, C, K, folate, and B vitamins
    • Minerals: Magnesium, potassium, iron, calcium

    This nutritional profile makes pasta primavera a balanced meal with complex carbs, healthy fats, fiber, and phytonutrients.

    Health Benefits of Pasta Primavera

    Now let’s explore the reasons why pasta primavera is more than just a tasty dish—it’s also a nutritional powerhouse.

    1. Rich in Dietary Fiber

    The vegetables in pasta primavera, such as broccoli, zucchini, and carrots, are high in dietary fiber. Fiber promotes healthy digestion, prevents constipation, and helps regulate blood sugar levels. Fiber-rich meals also increase satiety, preventing overeating and supporting weight management.

    2. Supports Heart Health

    Olive oil, often used in pasta primavera, is a staple of the Mediterranean diet. It contains monounsaturated fats that reduce “bad” LDL cholesterol while increasing “good” HDL cholesterol. Combined with vegetables rich in antioxidants, pasta primavera can lower the risk of cardiovascular diseases.

    If pasta primavera is prepared with whole-grain or whole-wheat pasta, it becomes an excellent source of dietary fiber. Fiber plays a critical role in reducing cholesterol levels, maintaining healthy blood pressure, and stabilizing blood sugar. People who consume more whole grains have a lower risk of cardiovascular disease.

    Whole-grain pasta also provides complex carbohydrates, which fuel the body steadily without causing spikes in blood sugar. Stable blood sugar levels are crucial for protecting the heart over time.

    3. Boosts Immunity

    Vegetables like bell peppers, broccoli, and tomatoes are excellent sources of vitamin C, which strengthens the immune system. Additionally, antioxidants in these veggies neutralize free radicals, reducing inflammation and protecting the body from illness.

    Pasta Primavera is more than just a colorful pasta dish—it is a nutritional shield for the immune system. Its abundance of vitamins A, C, E, folate, fiber, antioxidants, and plant compounds strengthens immune barriers, fuels white blood cells, reduces inflammation, and supports gut health.

    By combining fresh vegetables, olive oil, herbs, and whole grain pasta, Pasta Primavera delivers a synergistic array of nutrients that work together to fortify the body’s defenses against infections and chronic diseases.

    Incorporating Pasta Primavera into your regular diet is not only a delicious way to enjoy seasonal vegetables but also a practical strategy for maintaining optimal immunity. Pasta Primavera earns its place as a dish that protects and nourishes the body inside out.

    4. Aids Weight Management

    Whole wheat pasta combined with fiber-packed vegetables provides long-lasting satiety. Unlike refined carbs, whole grains release energy gradually, preventing sudden blood sugar spikes. This makes pasta primavera an excellent meal choice for people aiming to manage or lose weight.

    Here’s a breakdown of the specific mechanisms by which pasta primavera aids weight control:

    a Promotes Satiety

    The combination of fiber (from vegetables), protein (from added lean sources), and healthy fats (from olive oil) works synergistically to promote fullness. This reduces the likelihood of overeating.

    b Controls Calorie Intake

    By reducing the pasta portion and increasing vegetable volume, the dish lowers overall calorie density, enabling larger portions without excessive calorie intake.

    c Balances Macronutrients

    A well-prepared pasta primavera includes a balanced mix of carbohydrates, proteins, and fats. Balanced meals support steady blood sugar and reduce overeating triggered by energy crashes.

    d Encourages Healthy Eating Habits

    Since pasta primavera highlights vegetables, it naturally increases vegetable intake, which is linked to healthier long-term weight management. Pasta primavera is more than just a colorful Italian-inspired dish—it’s a model of balance, moderation, and freshness. With its vegetable-rich base, modest pasta portions, lean protein additions, and healthy fats, it aligns perfectly with weight management principles.

    By promoting satiety, lowering calorie density, stabilizing blood sugar, and encouraging long-term healthy habits, pasta primavera proves that eating for weight management doesn’t have to be bland or restrictive. Instead, it can be flavorful, vibrant, and deeply satisfying.

    To understand why pasta primavera supports weight management, let’s compare it with more indulgent pasta dishes.

    • Fettuccine Alfredo: Typically loaded with cream, butter, and cheese, leading to 1,200+ calories per serving.
    • Spaghetti Carbonara: Rich in eggs, cheese, and cured meats, with a high saturated fat content.
    • Lasagna: Heavy with pasta sheets, cheese, and meat sauces.

    By contrast, pasta primavera is light, emphasizing vegetables and moderate pasta portions. A typical serving might range from 400–600 calories, depending on preparation, making it more weight-friendly while still satisfying.

    5. Promotes Healthy Skin and Hair

    Carrots and zucchini are loaded with beta-carotene, a precursor to vitamin A, which supports skin health. Meanwhile, olive oil provides vitamin E, an antioxidant that protects skin cells from oxidative stress. Together, these nutrients contribute to glowing skin and stronger hair.

    6. Bone Health

    Broccoli and leafy greens added to primavera contribute calcium and vitamin K—essential nutrients for bone strength. Parmesan cheese, when included, also provides a calcium boost. These elements help reduce the risk of osteoporosis as you age.

    7. Supports Muscle Function

    Magnesium and potassium from vegetables like spinach and zucchini play a key role in muscle contraction, nerve function, and hydration. For active individuals, pasta primavera offers a nutrient-dense recovery meal.

    8. Helps with Blood Sugar Control

    Using whole wheat pasta ensures a lower glycemic index compared to refined pasta. When paired with fiber-rich vegetables, it slows down the absorption of glucose, helping maintain stable blood sugar levels. This makes it a diabetic-friendly dish when portion sizes are controlled.

    9. Hydration from High-Water Vegetables

    Zucchini, tomatoes, and cucumbers (sometimes used in primavera) have a high water content. These vegetables help maintain hydration levels, especially in warmer months.

    10. Mental Health Benefits

    Leafy greens and vegetables in the dish provide B vitamins and folate, which support brain function and mood regulation. Magnesium, also present in many vegetables, may help reduce stress and improve sleep quality.

    Tips for Making Pasta Primavera Even Healthier

    • Use whole grain or legume-based pasta: Chickpea, lentil, or quinoa pasta adds extra protein and fiber.
    • Go light on cheese: While Parmesan adds flavor, too much increases saturated fat and sodium.
    • Limit oil: Stick to 2–3 tablespoons of olive oil to keep calories balanced.
    • Add lean protein: Grilled salmon, tofu, or beans can round out the meal.
    • Season naturally: Use herbs and lemon juice instead of excessive salt.

    Pairing Pasta Primavera with Other Foods

    Pasta primavera can be served as a main course or a side dish. Some pairing ideas include:

    • With a fresh green salad: Adds extra fiber and crunch.
    • Alongside grilled fish or chicken: Boosts protein intake.
    • With a glass of white wine: Pinot Grigio or Sauvignon Blanc complement the fresh vegetable flavors.
    • With whole grain bread: For extra satiety.

    Why Pasta Primavera Stands Out Among Pasta Dishes

    Unlike creamy Alfredo or meat-heavy Bolognese, pasta primavera prioritizes vegetables. This makes it lighter, nutrient-rich, and easier to digest. It’s a dish that bridges indulgence and health, offering comfort without sacrificing wellness. It’s also versatile—whether you’re vegan, vegetarian, or omnivorous, you can make a version of pasta primavera that suits your needs.

    Conclusion

    Pasta primavera is more than just a bowl of noodles with vegetables—it’s a celebration of fresh produce, a nourishing balance of macronutrients, and a flavorful dish that adapts to any season. By preparing it at home, you control the ingredients, ensuring it remains wholesome and health-boosting.

    From aiding digestion to supporting heart health, boosting immunity, and helping with weight management, pasta primavera offers a wide range of benefits. Its versatility and nutritional richness make it a dish worth adding.